 By Claire Whitaker
Updated November 2026
An sdg&e net metering application is the formal request that connects your rooftop or ground-mount solar system to San Diego Gas & Electric’s grid and sets up credits for the power you export. Completing it correctly means your system is approved to operate, your bidirectional meter is installed, and your excess generation is credited on your bill. This guide walks through each stage in order so you know what to submit, what SDG&E will check and where delays usually come from.
What the SDG&E Net Metering Application Covers
SDG&E serves San Diego County and parts of Orange County, and it requires a formal interconnection review before any grid-tied solar system can be turned on. The net metering application is the paperwork and data package that tells the utility how big your system is, what equipment you are using and how the system will sync with the grid. Net metering itself is the billing arrangement that credits you for exported energy, so the application and the billing setup are linked but not identical.
Shopping for one? See our guide: Net Metering Solar Program vs Self-Consumption: Which Is Better for Homeowners?.
California’s rules for customer-generators are set by the California Public Utilities Commission, and SDG&E applies those rules to its own forms and timelines. Program details, export credit structures and rate options change over time, so always confirm current terms on SDG&E’s website or with your installer before you commit to a system size.
Step 1: Confirm Your System Qualifies
Before you fill out anything, check that your project fits the basic parameters. Most residential systems qualify, but the following points are worth verifying:
- Your home is served by SDG&E and the service is in good standing with no open disputes or unpaid balances.
- Your electrical service panel and service size can support the planned system, or you have budgeted for an upgrade.
- Your system’s AC nameplate capacity is within the size limits that apply to your service type (residential, small commercial or other).
- Your installer is licensed by the California Contractors State License Board and is familiar with SDG&E interconnection requirements.
The system size stated on your application is usually the AC output of the inverters, not the DC rating printed on the panels. Mixing those two numbers is one of the most common reasons for a returned application, so make sure your installer uses the correct figure throughout the paperwork.
Step 2: Gather the Documents You Need
Having everything ready before you start the online or paper form saves time. Expect to need the following:
- Your SDG&E account number and the service address exactly as it appears on your bill.
- Proof of ownership or landlord authorization if you rent. Renters need written permission from the property owner.
- A single-line electrical diagram showing panels, inverter, disconnects, the main service panel and the point of interconnection.
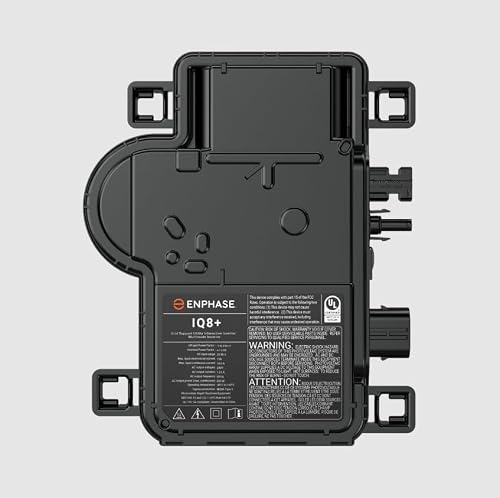
- Equipment specifications: panel make and model, panel count and wattage, inverter make, model and quantity, and battery details if you are adding storage.
- Your installer’s license number and contact information.
- A site plan or roof layout that shows array placement and setbacks.
Your installer typically prepares the diagram and equipment list, but you should review them. You are the one who signs, and any inconsistency between the diagram and the equipment list can stall the review.
Step 3: Complete and Submit the Interconnection Application
Most homeowners submit through the interconnection process that SDG&E administers for customer-generators. The form asks for the system details described above, the installer’s information and a declaration that the system will meet utility and safety standards. Enter every number carefully and make sure the AC output, inverter count and panel count match your diagram exactly.
Once submitted, SDG&E reviews the package for completeness and technical compliance. Some projects qualify for a faster screening process, while larger or more complex systems may require a detailed study. Which path applies depends on system size and the characteristics of the local distribution line, so ask your installer which track your project is likely to follow.
Step 4: Respond to Utility Review and Approval
SDG&E may send questions, request corrected documents or ask for additional information about your service. Respond quickly and in writing where possible. A missing signature or an unclear diagram can add weeks to the process. When the utility approves the interconnection, you receive authorization to install the system and, later, to energize it.
Approval to install is not the same as permission to operate. You generally cannot turn the system on until the installation is inspected by the local building department and SDG&E has completed any required meter work.
Step 5: Install, Inspect and Energize
After approval, your installer completes the work and schedules a permit inspection with your local jurisdiction. Once the building inspection passes, the utility installs or confirms a bidirectional meter that records both the energy you draw and the energy you export. Only then is the system energized and net metering billing begins.
Keep copies of the approved interconnection agreement, the inspection report and the final permission to operate. You will need these if you ever sell the home, refinance or make changes to the system.
Timeline Overview
Actual timing depends on utility workload, system size and how quickly the documents are corrected, so treat the table below as a planning guide rather than a guarantee.
| Stage | What Happens | What You Control |
|---|---|---|
| Preparation | Confirm eligibility, gather documents | Complete checklist before submitting |
| Submission | Interconnection application filed | Accuracy of system data |
| Utility review | Completeness and technical check | Speed of responses to questions |
| Approval | Authorization to install | Scheduling installer promptly |
| Inspection and meter | Permit inspection, bidirectional meter | Access for inspector and meter crew |
| Permission to operate | System energized, net metering begins | Keeping final paperwork |
Common Mistakes
- Mixing up DC and AC sizes. Use the inverter AC output on the form, and make sure the number matches your diagram.
- Incomplete equipment lists. Every inverter, panel model and battery must be listed. Missing models often trigger a return.
- Starting installation before approval. Installing before the utility authorizes it can put you at risk of rework or a rejected interconnection.
- Ignoring service panel limits. If the main panel cannot handle the added generation, an upgrade may be required before approval.
- Forgetting the landlord. Renters who skip written authorization frequently lose time to rejected submissions.
- Not saving records. Keep every confirmation number, email and signed document in one folder.
Tips for a Smoother Application
- Ask your installer to submit the application on your behalf and to track it through each stage.
- Read the approved interconnection agreement carefully, especially the sections on export limits and billing.
- If you plan to add batteries later, mention that during the initial application so the equipment can be reviewed together.
- Check your first bills after energizing to confirm that export credits are appearing as expected.
For context on how credits work once you are connected, see Net Metering in California: How It Works and What Homeowners Need to Know. If you are comparing programs, Net Metering by State: Rules, Credits and What to Check (2026) gives a broader view. Homeowners weighing the long-term value of the arrangement may also find What Is the Benefit of Net Metering for Home Solar Owners? useful. For a general checklist of qualifications, see Solar Net Metering Requirements: What You Need to Qualify (Step-by-Step), and if your bill shows unfamiliar charges, Solar Net Metering Bill Example PDF: How to Read Yours Step by Step explains each line.
Recommended gear
These items help with the documentation and monitoring side of the process.
- Fluke 1587 insulation multimeter helps you verify voltage and continuity during inspection prep if you are checking your own wiring details. View on Amazon
- Brother P-touch PT-D210 label maker is useful for labeling disconnects, breakers and conduit runs so the inspector can match them to your diagram. View on Amazon
- Three-ring binder with tab dividers keeps your application, approvals and inspection reports in one place for future reference. View on Amazon
FAQ
Do I need a permit before I submit the sdg&e net metering application?
Generally no. The interconnection application comes first, and the building permit is typically pulled by your installer after utility approval, in time for the required inspection.
How do I know if SDG&E will require a system upgrade?
SDG&E reviews your service and the local distribution line during the application. If the service panel or line capacity is insufficient, the review will identify required upgrades. Your installer can also assess this beforehand.
Can a renter submit the application?
Yes, but you need written authorization from the property owner, and the owner’s information may need to appear on the paperwork.
Why is the AC size important on the form?
The utility uses AC output to evaluate how much power your system can push onto the grid, so it drives the technical review and the protection requirements. DC panel ratings are not the figure SDG&E uses for interconnection.
Can I add batteries after my system is approved?
Usually you must notify SDG&E and may need an amended application if the battery changes how the system operates. Adding storage at the start is simpler.
Is the net metering bridge program the same as the application?
No. Bridge arrangements are billing transition terms, while the application is the technical and administrative process to interconnect. Confirm current program names and eligibility with SDG&E directly.
Should I hire a professional for the application?
Many homeowners rely on a licensed installer to prepare the paperwork, and that is generally a sound choice. If you have questions about electrical safety, electrical work and code compliance, consult a licensed electrician or your local building department before proceeding.
How long should I keep my approval documents?
Keep them for as long as you own the system. You will need them for insurance, home sales, refinancing and any future system changes.
Conclusion
Completing the sdg&e net metering application is mostly a matter of accuracy and preparation. Confirm eligibility, gather your diagrams and equipment details, check the AC sizing and respond promptly to utility questions. Once approved, inspected and energized, your system will begin generating credits. Work with a licensed installer, and verify electrical details with a professional when in doubt.
Ready to choose one?
About Claire Whitaker
Claire Whitaker is part of our editorial team and reviews and edits our home solar guides, checking product details against manufacturer specifications and owner feedback.