 By Claire Whitaker
Updated November 2026
Mighty Mule solar panel wiring usually means connecting a small solar panel to a Mighty Mule gate opener or similar automatic gate system so the battery stays charged. Done correctly, you end up with a charge controller, a battery and a panel that work together without overcharging or draining the battery. This guide walks through the wiring logic, the order of connections and the mistakes that cause most problems.
Understand What the Panel Is Feeding
Before touching any wires, confirm what the solar panel is charging. Most Mighty Mule gate openers run on a 12-volt battery, and the solar panel exists to keep that battery topped up between uses. The panel does not power the opener directly during operation.
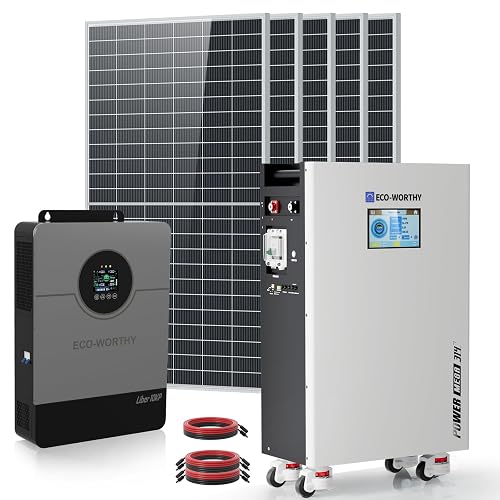
Shopping for one? See our guide: Solar Panel System for Home Installation: 6 Best Options Compared (2026).
Check the nameplate on the panel and the opener’s manual. You are looking for the panel’s rated voltage and wattage, and the battery voltage the system expects. A typical small panel for this job is rated near 12 volts nominal, but the open-circuit voltage will be higher, often in the high teens. That higher voltage is why a charge controller is required.
Wire the Panel to the Charge Controller
The charge controller sits between the panel and the battery. Its job is to regulate current so the battery is not overcharged. Connect the wires in this order:
- Turn off or disconnect any load and make sure the battery is disconnected from the controller while you wire it.
- Connect the panel positive lead to the controller’s PV positive terminal.
- Connect the panel negative lead to the controller’s PV negative terminal.
- Connect the battery positive to the controller’s battery positive terminal, using a fuse or breaker in that line.
- Connect the battery negative to the controller’s battery negative terminal.
- Only after everything is secure, connect the opener’s power lead to the controller’s load output if your controller has one, or directly to the battery terminals if it does not.
Always follow the controller’s labeled terminals. Reversing polarity can damage the controller immediately.
Choose Series or Parallel Connections for Multiple Panels
If you use more than one panel, the way you connect them changes the voltage and current the controller sees. Series wiring adds voltage and keeps current the same. Parallel wiring adds current and keeps voltage the same.
| Connection | Voltage effect | Current effect | Best when |
|---|---|---|---|
| Series | Adds together | Stays the same | Controller requires a higher input voltage |
| Parallel | Stays the same | Adds together | Controller is rated for higher current at a fixed voltage |
Match the panels to each other. Mixing panels with different ratings in the same string forces the weakest panel to limit the output of the whole group. Keep the total voltage and current inside the controller’s stated input limits.
Size Wire and Protect the Circuit
Use wire rated for outdoor and UV exposure, and keep runs as short as practical. Longer runs and thin wire lose power as heat. Install a fuse or breaker close to the battery, and mount the controller in a dry, ventilated spot. Check your local electrical code, and if the run crosses a structure or goes into a building, consult a licensed electrician.
Common Mistakes
- Connecting the battery before the panel, or wiring with the battery disconnected while the panel is in full sun.
- Skipping the charge controller and wiring the panel directly to the battery.
- Using thin, unrated wire on a long run, which causes voltage drop.
- Mixing panels of different wattage or voltage in one string.
- Leaving connections loose or uninsulated, which invites corrosion and arcing.
Recommended Gear
- A PWM charge controller is a practical choice for a single small panel and battery, since it regulates charging without much setup. View on Amazon
- Outdoor-rated solar cable with MC4 connectors makes panel connections weatherproof and easier to disconnect for service. View on Amazon
- An inline fuse holder for battery leads protects the wiring if a short occurs. View on Amazon
FAQ
Can I wire the solar panel straight to the gate opener battery?
You can technically connect them, but it is not recommended. Without a charge controller, the battery can be overcharged or damaged, especially in strong sun.
Should I wire panels in series or parallel?
It depends on your controller’s input rating. Series raises voltage, while parallel raises current, so check the controller’s limits before choosing.
Do I need a licensed electrician for this job?
Low-voltage DC wiring for a small gate system is often manageable for careful DIYers, but if the work involves building wiring or local code requirements, consult a licensed electrician.
Conclusion
Mighty Mule solar panel wiring comes down to a clear order: panel into the charge controller, controller to the battery, and the opener on the controlled output. Match your panels, protect the circuit and keep connections secure. Check your equipment manuals for exact ratings before you start.
Related reading
- How to Make Solar Panels Pretty: 6 Ways to Hide Wiring and Blend Your Array
- What Is the Cost of Roof Solar Panels? A Homeowner's Q&A
- What Is Net Metering for Solar Panels? A Homeowner's Plain-English Guide
- What Does the Cost of Thermal Solar Panels Look Like for a Home?
- What Are Solar Thermal Roof Panels and Do They Work for Homes?
- What Are Roof Integrated Solar Thermal Panels and Do They Work?
Ready to choose one?
About Claire Whitaker
Claire Whitaker is part of our editorial team and reviews and edits our home solar guides, checking product details against manufacturer specifications and owner feedback.